
Key Takeaways
- Bend radius drives manufacturability: Specify ≥3D radius wherever geometry permits. Moving from 3D to 1.5D bend increases defect risk by 50%+ and cost by up to 80%. The 2D minimum rule isn’t negotiable without manufacturer approval.
- Tolerances must match function, not perfection: Apply tight tolerances only to critical interfaces using GD&T. Blanket ±0.010″ tolerances increase cost by 60% and scrap by 12%. Loose tolerances on non-critical features save money without compromising performance.
- Material selection is a four-way trade-off: Balance corrosion resistance, mechanical strength, formability, and cost. Specialty alloys like Inconel (8× cost) and titanium (12× cost) are justified only when carbon steel (1× baseline) or stainless (1.8-2.2× cost) cannot meet service requirements.
- Joints are leak paths; minimize them: Incorporate bends into continuous tube runs instead of using welded elbows. The HVAC case study reduced potential leak points by 50% through integrated bending. Fewer joints mean higher reliability and lower assembly cost.
- Early Supplier Involvement prevents late-stage rework: Engage manufacturers during the design phase to validate process capability, optimize bend sequences, and confirm tooling feasibility. Post-tooling design changes cost 10-100× more than preventive collaboration.
Custom tube assemblies demand rigorous engineering attention to material selection, geometry optimization, and manufacturing constraints. Success requires balancing functional performance against producibility, a discipline best achieved through data-driven design and early manufacturing collaboration. Whether you’re designing automotive hydraulics, aerospace structures, or industrial process systems—utilizing precision tube laser cutting services in Orange County or advanced bending techniques—these principles reduce cost, improve quality, and accelerate time-to-market.
Custom tube assembly design requires balancing functional requirements with manufacturing constraints. Learn industry-standard practices for material selection, bend radius optimization, tolerance specification, and Design for Manufacturability (DFM) to reduce cost, improve quality, and accelerate production.
What Is A Custom Tube Assembly, And When Should You Use One Instead Of Hose Or Pipe?
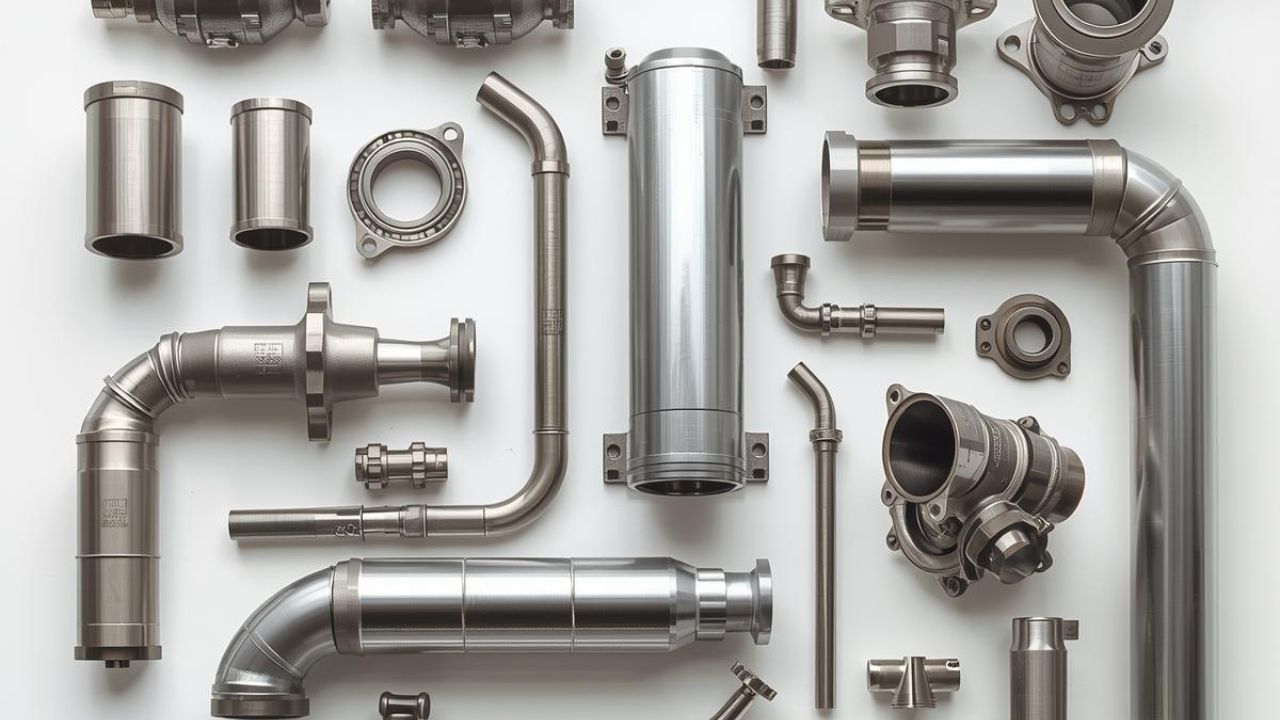
A tube assembly is a rigid metal conduit system fabricated from precision-dimensioned tubing with formed ends and integrated fittings. Unlike pipe (specified by nominal pipe size) or flexible hose, tubing is defined by exact outside diameter (OD) and wall thickness (WT) per ISO 1127 tolerance classes, critical for compression fittings, o-ring seals, and close-tolerance assemblies.
Tube vs Hose vs Pipe
| Feature | Rigid Tubing | Flexible Hose | Pipe |
| Dimensioning | Exact OD + WT (ISO 1127) | ID-based | Nominal Pipe Size (NPS) |
| Precision | ±0.005″ typical | ±1/16″+ | ±1/8″+ |
| Pressure | Up to 10,000+ psi | 150-3,000 psi | 150-3,000+ psi |
| Vibration Resistance | Excellent | Poor | Good |
| Best Use | High-pressure, tight spaces | Temporary connections | Large-volume flow |
When rigid tubing is the better choice:
- Compression fittings requiring exact OD tolerances
- High-pressure hydraulic systems (>3,000 psi)
- High-vibration environments (automotive, aerospace)
- Space-constrained installations
- Structural load-bearing requirements
What Requirements Should You Capture Before You Start Designing?
Define all functional, environmental, and geometric constraints before starting. Incomplete requirements cause costly redesigns. Use Interface Control Drawings (ICDs) and mockups to validate spatial constraints early in product development.
Critical design inputs:
- Operating Pressure: Min/Max with proof test at 1.5-4.0× MOP
- Temperature Range: -40°F to 400°F (carbon steel), up to 1500°F (Inconel)
- Flow: Straight paths minimize pressure drop; velocity <15 ft/s (liquid), <100 ft/s (gas)
- Media Compatibility: Stainless for corrosives, copper for refrigerants
- Vibration/Shock: Automotive: 10-2000 Hz; support every 3-5 ft
- Interface Points: ICD-defined XYZ coordinates (±0.010″ typical)
Environmental exposures: Humidity cycles, salt spray/chemical exposure (NACE compliance), UV degradation, temperature swings, shock/impact.
Space constraints: Connection coordinates, clearance envelopes, straight length (1.5-2.0× OD between bends, minimum 2× OD at ends), mounting brackets, installation/inspection access.
Serviceability: Disassembly frequency, tool access, replacement intervals, leak detection accessibility.
Which Codes, Standards, And Specs Should Guide Your Tube Assembly Decisions?
Apply recognized industry standards to reduce ambiguity. Identify applicable codes during requirements definition, retrofitting compliance is expensive.
Key standards:
- Material: ASTM A500/A513 (carbon steel), A269/A249 (stainless), B210/B221 (aluminum), B88/B75 (copper)
- Dimensional: ISO 1127:1992 (OD classes D1-D4, WT classes T1-T5)
- Bending: ASME B16.49, Pipe Fabrication Institute ES-24
- Industry-Specific: NASA PD-ED-1224 (aerospace), SAE J527 (automotive brake), NACE MR0175 (corrosive service)
When customer specs override standards: Document deviations, request written approval for non-standard processes, verify no safety code conflicts, and clarify acceptance criteria.
How Do You Choose Tubing Material And Condition So the Assembly Survives Its Environment?
Material selection drives performance, cost, and manufacturability. Match properties to operating conditions while factoring lifecycle costs.
Materials comparison (relative to carbon steel baseline):
| Material | Cost | Yield Strength (MPa) | Bendability | Key Use |
| Carbon Steel | 1.0× | 250 | 8/10 | Cost-effective, needs coating |
| 304 Stainless | 1.8× | 215 | 7/10 | General corrosion resistance |
| 316 Stainless | 2.2× | 290 | 6/10 | Marine/chloride environments |
| Aluminum 6061 | 1.5× | 276 | 9/10 | Aerospace, high strength-to-weight |
| Copper | 1.3× | 70 | 10/10 | HVAC, thermal conductivity |
| Duplex 2205 | 3.5× | 450 | 5/10 | 2× yield vs. austenitic stainless |
| Inconel | 8.0× | 760 | 3/10 | High-temperature (1500°F) |
| Titanium | 12.0× | 880 | 4/10 | Aerospace, extreme strength-to-weight |
Compatibility checks: Verify chemical compatibility, confirm temperature limits exceed operating range, validate structural strength, check galvanic compatibility with fittings, and assess supply chain lead time.
Avoid mixing alloys: Galvanic corrosion accelerates in moist environments. Use identical materials for tubes and fittings, or ensure galvanic compatibility/isolation.
How Do You Size Tube OD and Wall Thickness For Flow, Pressure, And Fatigue Margin?
Wall thickness must withstand maximum pressure with safety factor (1.5-4.0× MOP). OD is driven by flow requirements and fitting compatibility. Higher Wall Factor (OD/WT) means thinner walls prone to defects.
Sizing workflow:
- Calculate minimum WT: WT = (P × OD) / (2 × S × E + P)
- Select OD for flow velocity limits
- Verify Wall Factor manufacturability
- Add corrosion allowance (0.030-0.060″ typical)
- Apply ISO 1127 tolerance classes
- Confirm proof pressure requirements
ISO 1127 tolerance impact:
- D1 (±0.005″): Compression fittings, o-ring seals
- D2-D3 (±0.010-0.015″): General mechanical fittings
- T1 (±10%): High-pressure hydraulic
- Ovality limit: 2.5% max
Cost impact: Tight tolerances (±0.010″) increase cost by 60% and lead time by 5 days. Apply tight tolerances only to critical interfaces using GD&T.
How Do You Design Bends That Manufacture Cleanly And Still Hit Fit-Up?
Bend radius is the critical manufacturability parameter in tube fabrication. 2D minimum (CLR = 2 × OD), 3D recommended for high-reliability. Maintain 1.5-2.0× OD straight lengths between bends and at ends.
Bend design rules:
- Minimum: 2D; Recommended: 3D+
- Straight between bends: 1.5-2.0× OD
- End straight: 2.0× OD minimum
- Limit multi-plane complexity
- Keep material/WT consistent
Bend Radius vs. Defect Risk:
| CLR/OD | Wall Thinning | Ovality | Wrinkling | Cost Impact |
| 3.0 | ~8% | ~3% | ~2% | Baseline |
| 2.0 | ~28% | ~12% | ~12% | +15-25% |
| 1.5 | ~50% | ~22% | ~25% | +50-80% |
Prevention: Specify 3D radius wherever possible, reduces defects by >60% vs. 1.5D. Use mandrel support for radius <2.5D. Design single-plane bends. Locate features >3× OD from bend zones.
How Do You Pick End Connections And Fittings That Don’t Leak In The Field?
Connection method determines leak risk and serviceability. Permanent joints (welded/brazed) offer superior reliability but eliminate serviceability. Mechanical fittings enable disassembly but need proper support.
Connection comparison:
| Type | Strength | Leak Risk | Serviceability | Vibration | Best Use |
| Butt Weld | Highest | Lowest | None | Excellent | High-pressure >3000 psi |
| Braze | Medium-High | Low | None | Good | HVAC refrigerant |
| Flare | Medium | Medium | Good | Fair | Automotive brake lines |
| Compression | Medium | Medium-High | Excellent | Poor | Low-vibration instrumentation |
Leak prevention:
- Minimize joint count, incorporate bends vs. elbows (50% reduction in leak points, per HVAC case study)
- Specify double-lap flares for high-pressure/vibration
- Ensure 360° weld access and inspection capability
- Nitrogen purge during brazing prevents internal oxidation
- Document torque specs for mechanical fittings
How Should You Route Tubing So It’s Serviceable, Safe, And Resistant To Damage?
Straight paths minimize bending complexity and pressure drop. Use ICDs and mockups to validate clearances early. Never place features in bend zones where material is stressed.
Routing best practices:
- Default to straight routing; bends only where required
- Verify clearances with ICDs and mockups
- Locate features on straight sections ≥3× OD from bends
- Simulate the bend sequence in CAM to prevent collisions
- Allow for thermal expansion in high-temp systems
Service access: Provide welding torch access, ensure inspection capability, allow wrench clearance, and design for removal without disassembling adjacent systems.
How Do You Design Supports And Clamp Spacing To Prevent Vibration Fatigue Failures?
Proper support spacing dampens resonance and distributes loads. Clamp near mass changes (fittings, valves) and avoid high-stress zones.
Support strategy:
- Limit unsupported span: 3-5 ft (liquid), 5-8 ft (gas)
- Clamp within 6-12″ of heavy fittings/valves
- Avoid clamping at bend tangent points
- Use rubber-isolated clamps near vibration sources
- Include vibration testing in DVP&R
How Do You Specify Cleanliness, Cleaning, And Packaging So Contamination Is Controlled?
Define cleanliness based on application criticality. High-purity systems require precision cleaning; industrial service accepts standard degreasing.
Cleanliness levels:
- General Industrial: Visual clean, solvent degrease (baseline cost)
- Hydraulic: ISO 16/14/11, particle count (+10-15% cost)
- High-Purity: ISO 14/12/10, precision clean (+30-50% cost)
- HVAC: Oil/moisture-free, nitrogen purge (+5-10% cost)
Contamination avoidance: Minimize dead legs, design drainage slope (1-2°), use smooth bends vs. elbows, nitrogen purge during welding/brazing.
How Do You Document The Design So It Can Be Built, Inspected, And Repeated?
Complete documentation transfers design intent to tube assembly manufacturing. The 3D CAD model is the master, use it for CAM programs, CMM inspection, and check fixtures.
Documentation essentials:
- 3D CAD (STEP/Parasolid format)
- 2D drawing with GD&T, material, finish
- Bend schedule (CLR, angle, rotation)
- ISO 1127 tolerance classes
- Welding/brazing specs
- Cleaning/packaging requirements
- Inspection plan and test requirements
- Material certifications and traceability
Inspection planning: Define critical characteristics, apply GD&T True Position (±0.010-0.030″), establish datum structure, specify check fixture for series production, and provide CAD for CMM programming.
How Should You Test And Verify The Assembly Before You Release It To Production?
Testing validates the design before production tooling. Proof pressure is mandatory (1.5-4.0× MOP). Leak testing uses progressive methods. Vibration/thermal cycling exposes latent defects.
Key tests:
- Proof Pressure: 1.5-4.0× MOP for 60 sec (100% of assemblies)
- Leak Test: Pressure decay or helium mass spec (<1×10⁻⁶ sccs)
- Vibration: Multi-axis per ISO 16750/MIL-STD-810
- Thermal Cycle: -40°F to +250°F (application-dependent)
- Dimensional: CMM verification vs. CAD
QA documentation: DVP&R, First Article Inspection (FAI) per AS9102, material certs (MTRs), Cpk ≥1.33 for critical dims, test records with pass/fail.
How Do You Take A Custom Tube Assembly From Concept To Release Without Rework?
Front-load design to avoid late-stage changes. Engage manufacturing early (ESI). Use simulation to catch errors digitally. Prototype, test, refine, then lock design.
Engineering workflow:
- Requirements: Capture functional, environmental, geometric, standards
- Material/Sizing: Select based on environment, calculate WT, apply ISO 1127
- Bend/Routing: 3D radius default, verify in CAM simulation
- Connections: Select joining method, design supports, ensure access
- Prototyping: CAD model, FEA/CFD analysis, CAM simulation, fabricate
- Testing: DVP&R execution, FAI, document failures
- Refinement: Incorporate feedback, update CAD/drawings
- Production: Transition to hardened tooling, establish SPC, verify Cpk
ESI best practices: Share CAD for DFM feedback, request Cpk data, validate bend sequence, conduct site audit, collaborate on check fixture design with manufacturing services providers.
What Common Failure Modes Should Your Design Review Explicitly Try to Prevent?
Most failures trace to design decisions ignoring manufacturing constraints. Use FMEA to identify risks.
Critical failure modes:
- Tight radii (<2D): +45% cost, +35% scrap → Use 2D minimum
- Insufficient straight length: Cannot clamp → Maintain 1.5-2.0× OD
- Blanket tolerances: +60% cost → Apply feature-by-feature with GD&T
- Features in bends: Distortion → Locate ≥3× OD from bends
- Poor weld access: Low quality → Verify 360° access
- Mixed materials: Galvanic corrosion → Use same material or isolate
- Complex 3D bends: +35% cost → Simplify to single-plane
Design freeze questions: Can radius increase to 3D? Are features on straight sections? Can manufacturer achieve tolerances (Cpk ≥1.33)? Is weld access clear? Applied loosest tolerances? Material readily available? Validated bend sequence?
What FAQs Should You Help Buyers, Designers, And Installers Align On?
What’s needed for engineered tube fabrication quotes?
3D CAD (STEP), 2D drawing with GD&T, material spec, batch quantity, finish, timeline.
Batch size cost impact?
Small batches (10 pcs) cost 120% more per part than large runs (1000 pcs).
Material cost differences?
Relative to carbon steel: 304 SS = 1.8×, 316 SS = 2.2×, Inconel = 8.0×, Titanium = 12.0×.
Why tight radii cost more?
Radius <2D increases cost 50-80% due to specialized tooling and scrap risk.
Tolerance cost impact?
±0.010″ vs. ±0.030″ adds 60% cost and 5 days lead time.
Prototype vs. production tooling?
Prototype: softer materials, <100 parts. Production: hardened steel, 10,000+ parts, higher upfront investment.
Typical timeline to first articles?
4-8 weeks (2-3 weeks tooling, 1 week trials, 1-2 weeks assembly/testing).
What Should Your Final Release Checklist Include Before You Ship The Design To Manufacturing?
Design Fundamentals:
- Bend radius ≥2D (≥3D preferred)
- Straight length 1.5-2.0× OD between bends and at ends
- Features on straight sections ≥3× OD from bends
- Consistent material/WT throughout
- Bend sequence validated in CAM
Tolerancing:
- Loose tolerances where functional
- GD&T True Position on critical interfaces
- ISO 1127 OD/WT classes specified
- Ovality limit (2.5% max)
Joining & Testing:
- Weld type specified with 360° access
- Post-weld inspection method defined
- Support locations for vibration damping
- Proof pressure (1.5-4.0× MOP) defined
- Leak test method specified
Documentation:
- 3D CAD in neutral format
- Complete 2D drawing with a bend schedule
- Standards cited (ISO/ASME/ASTM)
- Material certs and traceability required
Manufacturing:
- ESI feedback incorporated
- Cpk verified for critical characteristics
- Prototype testing complete
- Production tooling approved
Engineer For Manufacturing, Not Just Function
Every specification directly impacts production cost, lead time, and quality. DFM isn’t an afterthought; it’s the discipline that transforms concepts into reliable, cost-effective products.
The data proves the impact: 1.5D vs. 3D bend increases scrap by 35% and cost by 50%. Blanket tight tolerances add 60% to cost. Inconel vs. carbon steel multiplies material cost by 8×. These are real costs absorbed by your budget.
Effective teams front-load design effort. They define complete requirements first, engage manufacturers early (ESI), use simulation (CAM, FEA) to catch errors digitally, prototype rigorously, and refine based on data. Collaboration using ISO standards, GD&T, and process capability delivers assemblies that meet functional requirements economically.
Ready to partner with a manufacturer who understands both engineering and production—from industrial applications to certified aerospace component fabrication services? Contact CRD Manufacturing to discuss your custom tube assembly project.